Thursday, June 5, 2008

Taking a Break from Scrapbooking Notes


Me and DH at Opening Day!


Beautiful Daughter at BFF's wedding


Sweet Doggie on brand new decorative pillow from BB&B. Is now her pillow!

Man! It's windy today!

Tuesday, June 3, 2008

More Notes on Journaling

Here is more good information regarding journaling.

60. Photo-less journaling - Don't let a lack of photographs from a certain event keep you from recording it in your scrapbook. In addition to telling the story, describe the setting of the place, add quotes from those present and record the personalities of people to make the story complete without photos.

This is a good idea! One whole page of just journaling. I think I'll try that.

61. Send postcards - For more interesting travel pages, send a postcard to yourself while on vacation. When you receive it, add the postcard to your pages for instant travel journaling.

How about this idea...Start a travel album. 6X6 or 8X8 with just postcards you have sent yourself from where ever you have traveled and journaling about the trips.

62. Show, don't tell - A basic rule of writing that translates well to scrapbooking is using your words to show something and not just tell about it. Instead of saying a garden is beautiful, describe the colors, shapes and types of flowers that made it beautiful. Instead of saying the day was cold, say you could feel the chill of the air in your bones and describe the type of wind or precipitation.

This is a great idea and a thesaurus would come in real handy.

63. Use your five senses - Record aspects fromall five senses - touch, taste, hearing, seeing and smelling - All these things affect how we appreciate life. In your journaling, others can appreciate what you experienced too.

To me, 62 & 63 are the same thing.

64. Interviewing - Utilize the living history you have by interviewing older relatives for heritage albums. Ask them about old photos you've acquired and tape record the conversations. Use what they say for heritage scrapbook journaling.

Another use for this suggestion is interview a small child. Ask deep questions of relatives your age. Ask fun questions like - If you could have a super power what would it be?

65. Labeling - Try to include dates and names on every page of your album in some way. If pages of your album are separated in future years, these names and dates will be helpful to put the page in context.

This is usually fairly easy to do and a good idea.

66. Bigger isn't better - Large, fancy words do not make for more interesting journaling - they usually just make journaling harder to read and understand. Write in conversational manner, using words you'd say if talking.

Duh! Most folks would have to look up fancy words to add to journaling.

Monday, June 2, 2008

Journaling

This is a very important section. Journaling is something all of us need to do more of. Everyone admits it...you know you do.

55. Original handwriting - Even if you do not like your handwriting, it's important to include it in your scrapbooks at least some of the time. Think about how interesting it can be to look at something written generations ago. The same goes for your handwriting - think how your descendants will appreciate it.

Bunk! Well, not totally bunk. I guess we strive to have perfect pages and most of us don't journal because of our less than perfect handwriting. Challenge: Use your handwriting on your next page.

56. Write freely - To help focus on what you'd like to say, sit down at your computer and type or use a ruled notebook and pen. Freely write down whatever comes to mind. Don't worry about grammar, punctuation or spelling. This can help you focus on what you'd like to say without the confines of a small journaling space.

Good idea! Then you can either copy the journaling in your own handwriting or print on vellum. It gives you a good idea of the space you will need on your page for the journaling.

57. Bullet points - One fast and easy way to include important details in your scrapbook is through bullet points. You don't have to worry about writing complete sentences; it allows you to fit more details on a page and the bullets can be used as design elements.

Bullet points don't have to be like bullets in a report:
  • Like this
They can be like this:


58. "Found" journaling - Collect brochures and other items as you travel to help with journaling. You won't have to rely on your memory when you have stacks of information to choose from . It's also helpful to photograph billboards. The items you gather will help yield more complete journaling.

Look for "found" journaling in:
  • packaging
  • advertising
  • catalogs
  • recipes
  • newspaper articles
  • internet sites
  • place mats
  • drink coasters
  • backs of postcards
  • plaques at historic sites
  • road signs
  • books and pamphlets
  • magazines
  • handouts and flyers
  • menus
  • correspondence
Like this page I made about our cooking class in the famous Le Cordon Bleu in Paris. This was part of the pamphlet they gave us about our chef and what he was cooking.

Sunday, June 1, 2008

Layout and Design Part Dos

More ideas for layout and design from Memory Makers...

43. Use the same base colors - When combining patterned paper, choose ones with the same base shades. For example, even though blue and yellow usually look good together, a yellow pattern with a bright white background will not match a blue pattern with beige undertones.

Just like wine with dinner...use what you like!

44. Heavily journaled pages - Make pages with lots of journaling more visually appealing and easier to read by treating various words differently through-out. Write some in different colors, add interesting capital letters at the beginning of each sentence, add a variety of small stickers, etc.

I think this is self explanatory but, bottom line is most of us don't journal enough much less doing a whole page of it. This is a challenge...JOURNAL A WHOLE PAGE!!!

45. Sketch your ideas - Move photographs into different arrangements on a page or spread until you find the most appealing design. Then place other objects around them. When you've settled on a complete design, sketch it on paper.

This is always a good idea. Another good idea is to "scraplift". Scraplifting is just the idea of stealing someone else's design an putting your pictures and embellishments on your pages.

46. Utilize extras - When faced with lots of extra photos or an over abundance of supplies, take advantage of this by trying a few non-traditional page designs. Cut the photos in small squares for a mosaic page, or adhere paper scraps and other supplies at random for a unique collage-style page.

Always remember - you don't have to use every picture you have. Sometimes picking the best picture can be a difficult job because sometimes they are all good and tell a great story (like family reunion photos). Don't limit yourself a to one or two page layout. It's your scrapbooking...make a mini-album or several 12X12 layouts.

47. Balance - Distribute page elements evenly on all sides of the page to achieve a balanced design. For example, if a dominant photograph is located in the top left corner of your page, offset it (but don't overpower it) with an embellishment in the bottom right corner. You don't want your page "leaning" heavily to one side or the other.

Here is a good example - Photo in the upper left and large "bling" embellishment on the bottom right.

Saturday, May 31, 2008

Layout and Design

I think we all have a lot to learn about layout and design. Here are a few tips.

36. Save room to write - The most beautifully designed page is not complete without journaling. When creating a page layout, make sure you save room for writing.

I don't completely agree with this statement. Sometimes a great photo and a good title are enough. Take this photo for example:


37. Accent color - When choosing colors for your layouts, select one or two less dominant colors from you photographs. Use those colors for background paper, photo mats and more to make your photos really standout.

It's always a good idea to use colors from your photos to blend in the background of your page. However, using black and white photos and sepia tone photos - the color combination is almost endless.

38. Photo direction - Position your photos so the subjects in them are not facing off the scrapbook page. An inward-facing subject will draw reader's eyes into your page and not away from it.

There is some great photo editing software that can take a photo and reverse it so it will work better on a page.

39. Theme albums - To create a theme album, chose a consistent style that will run through the entire album. Allow certain colors, shapes or techniques to repeat through out for a focused, unified design.

Hey - we don't always make theme albums. I keep and on going album for photos I just happen to take that I think will make a great scrapbook page...you know, just everyday life.

40. Unification - Make your double-page spreads come together by laying out both pages at the same time. To unify the pages, try running each half of a title across the spread, use the same background paper, mirror the layout or add identical design elements.

This is always a good idea. I hardly ever use the mirror image idea however, I always seem to have one great photo that is large and a bunch of smaller photos that I like to cram on the other page.

41. Focal point - For impactive page design, make sure your layouts have a single focal point - a place for people to look first. This can be achieved in many different ways, such as with an enlarged photo, an interesting shape, color, texture, etc.

Some times the focal point can be the design. Example - swirls coming out of one circle and each swirl ending with a small photo cut from a circle stamp. I also like the idea of laying out a template similar to a tic-tac-toe board. This divides the page into thirds which is attractive to the eye.

42. Letter-sticker placement - To avoid the hassle of perfectly straight letter sticker titles, purposely apply each letter to your page at an angle for fun, playful look.

Another way is place each sticker letter on a piece of cardstock and cut out the cardstock. This is like framing each letter in a way.

Tools & Supplies Cont.....

Well, I just purchased another tool from e-bay just this morning. I bought a BoBunny Flex Ruler and I have bids on a Crimper and a new template from HOTP called Easy Stitches. I have been looking over the ruler for quite some time and stitches are everywhere!!! With this template you can make stitches without draggin' out the old sewing machine.

Now - let's get back to our tool and supply list.

27. Color wheel - A color wheel is great for helping select colors that complement and contrast with one another on page layouts.

A color wheel is great for those hard to match card stock colors. If you can't match it - contrast it!

28. Multiple mats - Nested templates are helpful for cropping photos and cutting mats quickly in many graduate sizes.

I love mats but hardly ever use more than one.

Here is a mat of a different sort - it comes from the book "More than a Page" from Memory Makers Books. The background is a solid piece of cardstock with several "scraps" to make one big multi-colored mat.


29. A computer - Eliminate misspellings and grammatical errors in your journaling by typing it on the computer first. Also, experiment with your word processing program to make page titles.

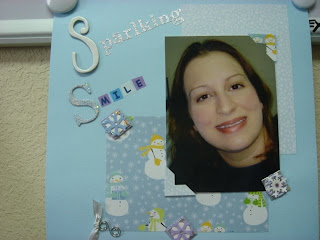
Here is a perfect example:

Three other people besides myself looked at this layout and not a single soul noticed I had misspelled "Sparkling". I got home and showed it to Heather and she said "Momma, who is the Sparl King?" She is such the smart aleck!!! That just gave me an opportunity to make another page called "The Sparl King".

30. Internet - Tons of fonts are available online for scrapbookers to download. It's also a great way to buy products, chat with other scrapbookers and find layout ideas.

At the price of gas now hovering around $4.00 a gallon it makes more sense to purchase items through sources like e-bay and other online stores. Here is a new one www.scrapbookpal.com.

31. Adhesive remover - Un-du adhesive remover is good for removing photographs from unsafe albums and for removing stickers and other items that weren't placed correctly.

Once again...never heard of this stuff. I need to get out there and check it out. Maybe some will let me know if they have used it before.

32. Albums - When starting to scrapbook, first choose the type of album you'd like to use (strap-hinge, post-bound or three-ring binder style). THis will be a determining factor for many other types of products you'll buy. A variety of album sizes are also available.

Right now I am loving the three-ring binders. I hardly ever post a two page layout that needs to meet in the middle. Secondly I like the strap-hinge or snap load hinges. These work great and no screwing & un-screwing.

33. Page protectors - The type of protectors you purchase will depend on the album style you choose. The top-loading style is easiest to work with, and can be used to store page elements before the page is finished.

Most important issue when using page protectors "one size does NOT fit all". If you have a favorite brand/type of album you need to remember which page protector to purchase.

34. Tweezers - A regular pair of tweezers is a helpful tool to keep with your scrapbooking supplies for picking up and placing small paper embellishments like punch art and placing them on your pages.

I showed you this in a previous blog...but, it's such a great tool you should have two in case someone wants to borrow yours:


35. Clear storage bags - Many scrapbookers use zipper-style storage bags for sorting scrapbook items, including die cuts, punched shapes and memorabilia.

Can't have enough of these little bags.

Tuesday, May 27, 2008

Tools & Supplies

OK. I admit it. I'm a tool freak. OK. I love supplies too! OK. I'm a collector. I sometimes think I would rather shop for scrapbooking supplies and tools than actually scrapbook. That's not completely true...but, I really, I mean I reeeeaaaallllllly love to shop for scrapbooking stuff!!!

15. Office supplies - Basic supplies from a desk drawer solve many scrapbooking challenges. Use a label maker for journaling, create a title with tags, or embellish with tabs, clips, stencils, brads and more.

Post-it notes! Great all around scrapbooking tool.

16. Adhering pocket pages - To make pocket pages that won't fall apart over time, choose high-quality double-sided tape or double-sided foam tape (to allow extra room in the pocket). Or, for a sturdy yet decorative pocket, stitch it in place or hammer decorative eyelets in place around the edges of a pocket.

I have never used a pocket page. I like top loading page protectors and it is always too difficult to get the page out to pull out what is in the pocket. But, if you do use pocket pages...the double-sided tape sounds like a great idea.

17. Fast trimming - A personal paper trimmer is a practical tool for cropping photos and mats. You'll be able to work more quickly than with regular scissors.

Love a good paper trimmer! That's all I have to say about that!

18. A basic pen - A black, fine-tipped pen should be your first pen purchase when starting to journal on scrapbook pages. Other colors can be added later, and certain tip styles such as brush and chisel can be harder to use if you are inexperienced. Black goes with everything and the fine tip is easy to write with.

This is a good suggestion. My suggestion for the next pen you purchase is a pen that writes white. There are nearly as many reasons to need to write on dark colors as there are for a black pen to write on white!

19. Punch repair - If you paper punches start to stick after repeated use, try punching them through wax paper. If the sticky residue remains, squirt Un-du adhesive remover on the punch's metal "blade".

I have never heard of Un-du. It may be readily available in craft stores but Goo-be-gone can be purchased in hardware stores and is great stuff! Another idea - to sharpen your punches punch them through fine grit sand paper. This keeps the edges good and sharp.

20. Cardstock letter stickers - If you love alphabet stickers, try the variety of stick-backed cardstock letters available. They are easier to pull from the sticker sheet and faster to apply to your page.

This is what you need:

Greatest tool around...At least it's my favorite. You can adhere any sticker. Even the thinnest of stickers are easy to manage with this tool. It seems a little backwards at first as it doesn't work like a regular set of tweezers but as soon as you get the hang of it...it's second nature.

21. Photo adhesives - While there are many adhesives on the market, when mounting photographs, a dry adhesive (tape or photo corners) is best.

I think everyone has their preference. Mine is Herma Dotto. Love it! I once read in a scrapbooking magazine a designer who preferred to use a glue stick just because they were cheaper than anything else.

22. Coordinating products - To easily coordinate colors on a layout, purchase a variety of products from the same company. Many companies now sell stickers, paper, titles and more that are meant to go together on the same page.

This has to be one of the top ten best ideas. Stampin' Up is a good source for ink, printed paper, card stock, and embellishments that all coordinate with each other. Individually, you can purchase what you need or purchase it all (that's what I like). Or just run to Wal-Mart and buy a page kit. There are great kits everywhere.

23. Corner rounder - A corner rounder is an inexpensive tool that can give photographs a polished look in seconds.

One of my favorite new tools is the ticket punch from Stampin' Up. It is a great look when you put printed over CS and use for journaling blocks.


24. Repositionable stickers - Sticker that can be repositioned easily before forming a permanent bond to your page often mean less mistakes and less headaches.

I don't think I've ever even seen these stickers. I always try to position stickers before I stick them and sometimes cut them from their page and lay them on the page prior to sticking.

25. Stamping starters - For a beginning stamper, basic items to purchase are a black ink pad, wood or acrylic-backed stamps (foam can be harder to work with), a set of colored markers and bottle of stamp cleaner (or baby wipes). A heat embossing gun and embossing powder are good "next-step" purchases to consider.

This is a good basic list of product.

26. Rulers - A clear grid ruler is handy for a wide variety of situations, from simply keeping your journaling straight to spacing a title across a spread, to helping you chose the width of your borders.

A ruler is another top ten tool to keep in your stash.